If you’re in the UK you must have heard about the dressmakers ball. When this was first announced I looked into getting a ticket to go. And then my husband ruined everything by pointing out that it’s at 7.00pm on a Friday night in Leicester which is a bugger to get to on the train from Scarborough. Even if I left work the instant I finished I would be very late and stressed. I’ve decided to be jealous of everyone who is going and just hope that they do it again next year (on a Saturday please so us workers from far away can go!).
Anyway, that’s not stopped me from making an outfit for it! The Simple Sew ‘theme’ for April and early May is the Dressmakers Ball and we are all making ball gowns (or ‘ball separates’ in my case) from Simple Sew patterns.

You can purchase both the top and skirt pattern here.
About a year and a half ago I made the Sophia top out of sequin fabric and wrote about it here. It was always my intention to make the skirt to go with the top but I just never got round to it. Well this was my chance to put that right. Now, I had very limited time for this make. Whatever I chose would have to be quick and easy. Simple Sew patterns are very easy (hence the name!) but I do sometimes have to spend a lot of time on the fitting process. I didn’t have time for that so I chose a simple skirt that only needed to fit around the waist. I also didn’t want to spend too much money on it either. If I was really going to the ball I would have probably put more effort into finding suitable fabrics, but actually I’m chuffed to bits with how my skirt turned out.
My original idea was to have a taffeta underskirt with a chiffon overlay. I still think that would be really pretty. However, beggars can’t be choosers and I unfortunately couldn’t find either of those fabrics locally. What I ended up getting was some cheap satin to use as an underskirt. The overlay is like a synthetic organza and it’s a lot stiffer than chiffon. It’s got a little sparkle to it though, and now it’s made up it looks quite pretty.
Making this skirt was cinch. As I didn’t want pockets (tricky in a skirt with an overlay!), there were only two pattern pieces to worry about, and one of those was the waistband. You essentially make the same skirt twice. First I cut out the satin.
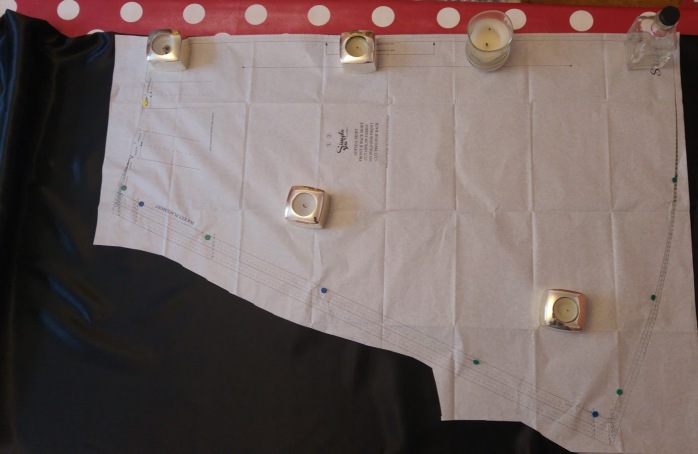
I don’t think it matters in a skirt with an overlay but I cut the pattern pieces in the same direction because satin has a nap (i.e. it looks different in different directions). Because the fabric was so slippery I used a mixture of pins and fabric weights to keep everything in place. There is one pattern piece for both the front and the back. For the front you cut out on the fold and for the back you add a seam allowance and cut two.

I cut out exactly the same in the organza. I then sewed together the side seams on each skirt. For the satin skirt I sewed the seams and finished them with the overlocker but for the organza layer I sewed French seams to enclose the fraying edges. When this was done I basted the skirts together at the waistband edge. It was then time to do the pleats. OK, I admit that I had already pleated the satin skirt before I realised that was never going to work. I unpicked the satin, basted the two layers together at the waistband edge, and then pleated the skirts together, folding through both layers of fabric.
For the waistband I basted the satin and the organza together within the seam allowance and then treated it as one. The waistband facing was just a satin layer with interfacing. Once the waistband was complete it was invisible zip time! I was expecting some difficulties with this but actually it was fine. To install the zip I sewed through both layers of fabric. My waistband seams don’t quite match up but they’re not far off so I carried on regardless!
Once the zip was in it was time to finish the back seams. This was done separately for each fabric. I couldn’t do a French seam in the organza layer though so to avoid seeing a seam through the sheer fabric I sewed a straight seam, RST as normal. Then, keeping the seam allowances together, I sewed a narrow zigzag stitch a few millimetres away from the original stitching line. I then cut the excess seam allowance right up to this new stitching line.
Next it was the hemming. I hemmed each layer separately. For the satin I just double turned up the hem and stitched. I shortened this skirt by about 3 inches first. I knew that I wanted the overlay to come below the satin layer.
For the organza layer I originally did a baby hem. It wasn’t quite dainty enough so I manned-up and read my overlocker instruction manual on how to do a rolled hem on that. What a difference that made. Here is my overlocked rolled hem – I’m mighty pleased with this!

So here are the finished items! I love how they look together. I can’t wait until I have an occasion to wear both these garments!

So if you’re going the the Dressmakers Ball (or any other occasion for that matter!) then I hope I’ve shown that, whilst fun, it is not entirely necessary to make a full-on ball gown. A simple skirt and top will work too if you think about your fabric choices and your finishing.


EDIT – this post was actually written some time ago and due to technical issues, it has not appeared on the Simple Sew blog yet but it will. As the ball is tomorrow (at time of writing) I’ve decided to be naughty and post it here first!

Glorious! You look sensational. Formal separates for the win!
What a lovely comment to wake up to! Thank you so much 😀
I love that look, so elegant and it looks fabulous on you! I love the overlay….great idea.
Thank you! The overlay was very simple to do. I just need to find an occasion to wear it. I will probably have to wait until Christmas!
I’m loving this. I’ve got a wedding next year and this could be a contender
Oh yes! It would look great. And it’s so easy to do!
Love the finished outfit. I made the top on gold sequin fabric for last Christmas work do but ended up buying a RTW skirts. This has inspired me to make the skirt to match and might have to copy your two layers idea!
Thank you! I actually find it difficult to wear the top because it only looks right with very high waisted skirts (but not trousers funnily enough). I’ve only got one other skirt that actually looks right so I’m glad I made this one! The skirt really is very easy to make. You’d have one whipped up in no time!
I bought a navy pleated mid length skirt to wear with mine but agree that high waisted skirts suit it better than trousers x
Ooh navy and gold! I bet they look great together!
You look seriously stunning in that outfit! I don’t think you should be waiting until Christmas to wear it!
I’ll try not to wait until Christmas! Thank you for your lovely comment. I do scrub up when I have to although there was a lot of makeup involved!
Looks brilliant, I think Paul should take you somewhere fancy so you get to wear it 😊 Xxx
Ha ha ha ha! Good one Lorna! Xxx
Looks lovely and so many more options with separates. Hope you get to go next year!
Thanks Manju. Would love to go next year – fingers crossed!
It’s very pretty! I love the two pieces too!
Thanks very much! I’m very pleased!
Oh I love this whole ensemble!! The rolled hem is perfect! 🙂
Thanks very much! I’m so pleased I tried out the roll hem on my overlocker. I really don’t make the most of my overlocker at all. Playing with the rolled hem has made me less nervous to try new things with it. I might just try the piping foot next!
These work so well together and you look gorgeous! I hope you can make it to the Dressmaker’s Ball next year, although it’s FAR too far for me to even consider it:(
Thanks very much – I’m really pleased with how they go together. I only hope the skirt gets as much wear as the top! I hope I can go to the ball next year (I sound like Cinderella!) but if it’s going to be on a Friday again that won’t happen. You’ll have to organise a Southern one!
It’s so cute! Love this outfit!